

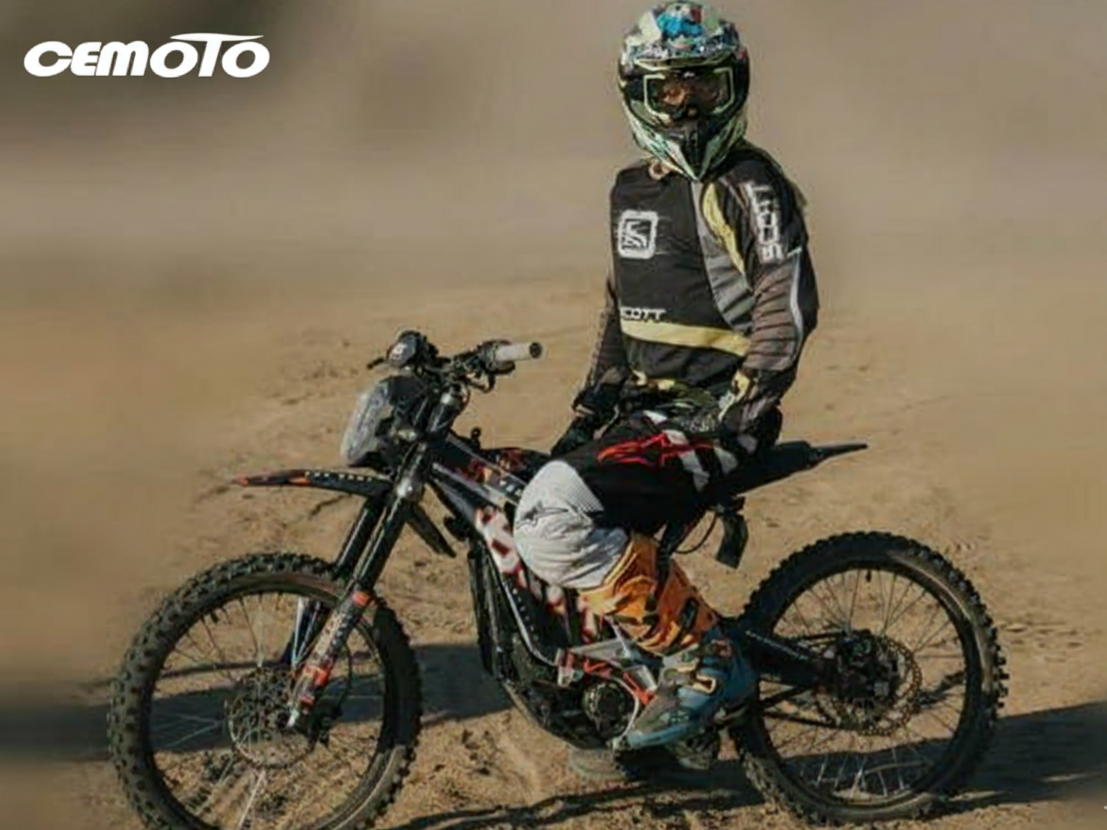
Riding an electric dirt bike in the outdoors is not an easy task. It requires training, confidence, and expertise. But in addition to that, the silent power and higher torque offered by the bike make it somewhat challenging too. This article will teach you how to ride an electric dirt bike on rough surfaces by performing just five easy exercises.

Drill 1: Slow-Speed Balance and Control
The balancing at a lower speed indicates where confident cyclists meet cyclists who are a little nervously balanced on bikes. It is a phase where you should build your foundation skills because you cannot move forward with confidence if you are a low speed balance rider.
Setting Up Your Practice Area
Look for an open area that is 50 feet long. Start your electric dirt bike and operate it slowly. You can try to keep your bike moving at a steady pace for at least 20 seconds. Do not focus on your front tire.
Keep your body relaxed. You cannot balance if your muscles are tight. Control the throttle and handlebars with care. It will take concentration despite having smooth power delivered by the electric motor.
Adding Complexity With Slalom Patterns
When you are able to keep the bike on a straight line, add the slalom course with cones or markers. They should be placed 10 feet apart to begin with. Now, run the course at walking speed by weaving between the cones.
Key Points for This Drill:
- Keep your head up and look where you want to go
- Use two fingers on the front brake for fine control
- Practice for 10-minute sessions to avoid fatigue
- Gradually reduce the spacing between cones as you improve
Leveraging Electric Power Characteristics
The quietness of an e dirt bike motor helps the rider concentrate with the drills. Engine noise would be a distraction while working on these skills. It may also help the rider perform these drills for a longer period because the power produced does not threaten the rider.
Quick reactions call for more delicate control. A gentle touch is essential. Small wrist actions are direct contributors to power. It may sound paradoxical, but sensitivity breeds more refined skills.
Drill 2: Standing Technique and Weight Distribution
Standing on your electric dirt bike changes everything about how it handles. Your legs become suspension, and your weight becomes a steering tool.
Mastering the Basic Athletic Stance
Start on flat ground. Stand on the pegs with your knees slightly bent. Your arms should be relaxed with bent elbows. This athletic stance allows you to absorb bumps and shift weight quickly. Many riders make the mistake of standing too stiff or gripping the bars too tightly.
Practice shifting your weight fore and aft while standing still. Lean forward until your weight is over the front wheel, then shift back over the rear. This movement should come from your hips, not just bending at the waist.
Progressive Standing Exercises
Start with 30-second standing intervals when riding on flat ground. Then increase these intervals to several minutes. At first, it may cause fatigue to your legs.
Next, practice riding the bike while standing over small obstacles. Riding an electric dirt bike with reliable power delivery helps the rider concentrate on positioning rather than worrying about throttle feedback. Begin with moderate speeds and gain confidence to increase the speeds.
Following this, you need to look for terrain with small features such as rocks, roots, and shallow ruts. Practice riding in this terrain while standing. Allow your lower body to absorb the shock while keeping your upper body constant in an upright manner.
Weight Distribution for Different Terrain
| Terrain Type | Standing Duration | Focus Area |
| Flat ground | 1-2 minutes | Basic stance, balance |
| Small bumps | 30-60 seconds | Leg absorption |
| Uneven terrain | 20-40 seconds | Weight shifts, control |
| Mixed conditions | 2-3 minutes | Endurance, transitions |
Weight distribution becomes critical during climbs and descents. On uphill sections, shift your weight forward to keep the front wheel weighted. On downhill runs, move back to prevent going over the handlebars. The electric dirt bike for adults offers enough power for steep climbs, making this drill both challenging and rewarding.
Practice transitions between sitting and standing while riding. This skill proves essential on real trails where terrain changes constantly. Smooth transitions maintain momentum and control.
Drill 3: Precision Braking Techniques
Braking skill determines how fast you can safely ride. Poor braking technique leads to skids, loss of control, and crashes.
Individual Brake Control
Set up a braking zone with clear markers. From a moderate speed, practice stopping at a specific point using only the front brake. Then repeat using only the rear brake. Notice the difference in stopping distance and bike behavior.
On hard, flat surfaces, the front brake provides about 70% of your stopping power, but the rear brake helps with stability. In off-road conditions with loose or uneven terrain, use a more balanced front-to-rear brake ratio—typically 60/40 or even 50/50—to maintain traction and prevent front wheel lockup.
The electric motor's regenerative braking on many models adds another variable to consider. Regen braking primarily assists with speed control during deceleration, not emergency stopping. It works best for maintaining steady speeds on descents. Learn how your specific bike responds. Some riders find regen braking helpful for speed control, while others prefer traditional mechanical brakes for predictability.
Combined Braking Mastery
Now combine both brakes. The goal is smooth, progressive pressure. Think of squeezing an orange, not grabbing a baseball. Start with gentle pressure and increase gradually as needed.
Practice modulating brake pressure to maintain traction. Locked wheels mean lost control. You want maximum braking force just before the wheels lock. This takes practice to feel correctly.
Emergency Stop Practice
Mark three stopping zones at different distances. Approach at a set speed and try to stop within each zone. This builds muscle memory for different braking intensities.
Practice emergency stops from various speeds. Mark your stopping distances. Your goal is consistency, not just short distances. Being able to stop predictably matters more than stopping in the absolute shortest space.
Braking Drill Progression:
- Week 1: Front and rear brake independently
- Week 2: Combined braking at moderate speeds
- Week 3: Emergency stops from higher speeds
- Week 4: Braking while turning
Surface-Specific Braking
The instant torque of an e dirt bike means you need excellent brake control. Practice braking on different surfaces. Hardpack, loose dirt, and gravel all require different techniques. Loose surfaces need gentler rear brake pressure to avoid skidding. Hard surfaces allow more aggressive braking. Vary your practice locations to build adaptable skills.
Wet conditions change everything about braking. If possible, practice in light rain or on damp ground. Stopping distances increase dramatically, and wheel lockup happens more easily. These challenging conditions accelerate your learning.

Drill 4: Advanced Cornering and Turning
Turns expose weaknesses in technique. This drill builds the skills for confident cornering in varied conditions.
Circular Track Fundamentals
Create a circular track about 30 feet in diameter. Ride around it in both directions at a steady pace. Focus on smooth throttle control. The instant torque of an electric dirt bike makes throttle smoothness more important than on traditional bikes. Jerky inputs upset the bike's balance mid-turn.
Look through the turn, not at the ground in front of you. Your bike goes where your eyes lead. This takes practice, but the improvement in cornering ability is dramatic.
Body Position in Corners
When sitting through faster, flowing turns on smoother terrain, weight the outside peg and lean the bike beneath you. Your body stays more upright relative to the bike. This technique works well for high-speed, hard-packed corners. For technical, slow-speed turns on uneven terrain, standing provides better control and allows quicker weight shifts.
Switchback Technique
Find or create a course with tight switchback turns. These hairpin corners require combining everything you've learned. Approach standing, shift your weight to the outside peg, look through the turn, and use controlled rear brake to tighten your line if needed.
Start wide, apex tight, exit wide. This racing line works on trails too. It gives you the most room for error and the fastest path through the turn. Practice until the sequence becomes automatic.
Varying Turn Types
Set up different corner styles to master various situations:
Flat turns teach basic cornering mechanics. Banked turns let you carry more speed. Off-camber turns challenge your balance and weight distribution. Each type demands specific techniques.
Time yourself through a section with multiple turn types. Note which corners feel comfortable and which need work. Focus extra practice time on your weak areas. The best electric dirt bike riders excel at all turn varieties, not just their favorites.
Bermed turns allow higher speeds and feel more secure. Practice leaning the bike into berms while keeping your body more upright. Flat turns require more lean and commitment. Off-camber sections demand precise weight placement to prevent sliding downhill.
Drill 5: Integrated Course Navigation
Your final drill combines all previous skills into realistic riding scenarios. This prepares you for actual trail conditions.
Building Your Practice Course
Create an overall course with direct sections, turns of varying types, obstacles, mini hills, and braking zones. Begin with easy exercises. Record your time as you complete the course. Your results will mark the progression of your improvement over weeks of training.
"The course should have a natural flow, recreating the experience of trail riding. It should have areas where the student must hard-brake before turning. Then there must be areas where the student must stand to ride over obstacles. There will also be areas of tight balancing at slow speeds."
Course Layout Elements
A well-designed practice course includes:
- A slow-speed technical section with tight obstacles
- Standing practice over uneven ground or small logs
- A hard braking zone before a tight corner
- Multiple turn types at different speeds
- A short climb and descent
- Open sections where you can practice speed control
The quiet operation of an electric dirt bike allows extended practice sessions without noise complaints. Use this advantage to run your course repeatedly. Each lap builds muscle memory and confidence.
Progressive Difficulty Increases
Begin with larger turns and easier obstacles. As your abilities allow, turn smaller and introduce tougher challenges. Pack the obstacles more tightly. Use ever-steeper hill grades. Introduce areas with loose surfaces, which will test your control over traction.
It’s important that you vary your course layout every couple of weeks. This way, you won’t just memorize it but will actively read it. Off-road riding involves flexible riding skills, not memorized routes.
Record your lap times, but do not obsess about them. Focus on fluidity and control. A lap that is a little slower and more controlled will beat a lap that is fast and sloppy. The speed will naturally follow the improvement in technique.
Analyzing Your Performance
Consider practicing specific weak areas for focused 15-minute blocks. If cornering needs work, dedicate a session to just turning drills. This concentrated practice accelerates improvement more than always running full courses.
Video recording helps identify technique issues you might not feel while riding. Even a simple phone camera provides valuable feedback. Review footage and compare your form to proper technique. Small adjustments often yield significant improvements.
Keep a practice journal noting what felt difficult, what improved, and what needs attention. This written record helps you track long-term progress and identify patterns in your development.

Start Your Skill-Building Journey Today
These five drills will give you a clear framework to learn genuine off-road expertise on your electric dirt bike. These drills relate to each other in such a way that they form the foundation to allow advancement to tougher terrains. Repetition over time will give you well-rounded riders that operate their dirt bikes with confidence and finesse. Practice these drills one by one until mastered to receive surprising enhancements to your riding ability.
Frequently Asked Questions
Q1: How Long Should I Practice Each Drill Before Moving to the Next?
Spend at least three to five practice sessions on each drill before progressing. Consistency matters more than speed. Some riders need more time on certain skills. Move forward when the current drill feels natural, not just possible. You can also revisit earlier drills periodically to maintain those skills.
Q2: Can I Practice These Drills on Any Electric Dirt Bike Model?
Yes, these drills are applicable for any model of an e-dirt bike. The basic principles are the same despite their characteristics. Some models of electric dirt bikes are more ergonomic or powerful. They may make some drills easier, but basic skills always remain the same.
Q3: What Safety Gear Should I Wear During Practice Sessions?
Always wear a proper off-road helmet, goggles, gloves, boots, and protective clothing during drills. Even low-speed practice can result in falls. Knee and elbow guards add extra protection. Consider a chest protector and neck brace for courses with obstacles. Quality gear prevents injuries that could interrupt your skill development.
Q4: How Much Space Do I Need for These Practice Drills?
A flat area roughly 100 feet by 50 feet works for most individual drills. The integrated course in drill five needs more space, ideally 150 feet by 100 feet or larger. Access to varied terrain helps with standing and turning practice, but many foundational skills develop in compact areas.
Q5: Should Beginners Start With All Five Drills Simultaneously?
No, follow the progression presented here. Master drill one before moving to drill two, and so on. Each drill builds skills needed for the next. Jumping ahead creates gaps in your technique that limit your overall progress. The sequential approach produces better long-term results for riders at all skill levels.

Hinterlasse einen Kommentar
Alle Kommentare werden vor der Veröffentlichung geprüft.
Diese Website ist durch hCaptcha geschützt und es gelten die allgemeinen Geschäftsbedingungen und Datenschutzbestimmungen von hCaptcha.